Why off-the-ball communication will transform your team’s control of the game
You already know that possession and spacing win matches, but what separates good teams from great ones is how players communicate when they are not on the ball. Off-the-ball communication shapes movement, defensive shape, and the timing of runs. As a coach, you’re responsible for making those unseen conversations efficient, unambiguous, and repeatable so your players act as one unit without needing the ball to speak for them.
When you teach off-the-ball cues, you create a common language. That language reduces hesitation, improves reactions to transitional moments, and increases the speed at which your team adapts to pressure. Whether you’re working with youth squads or elite players, clarity and consistency in your cues will shorten learning curves and increase match-day confidence.
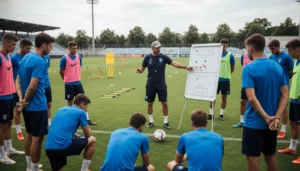
Practical cue categories every coach should teach first
Start by grouping cues into clear categories so players can prioritize what to listen and look for in fast moments. Use simple names that your squad can memorize and practise under pressure.
- Positional stabilizers: cues that keep shape — examples: “hold”, “line”, “stay.” These are non-negotiable when you need the team compact and balanced.
- Attacking prompts: cues that trigger runs, overlaps, or quick switches — examples: “now”, “over”, “switch”. They tell teammates when to commit forward or release space.
- Defensive alarms: immediate alerts for pressure, cover, or recovery — examples: “pressure”, “cover”, “drop”. These drive urgent movement and protect vulnerable channels.
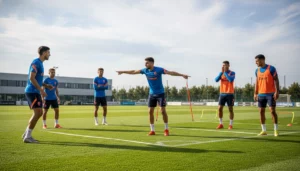
- Non-verbal complements: hand signals, eye contact, and body orientation that shorten reaction time when verbal cues are impractical because of crowd noise or distance.
How to make each cue functional and unambiguous
Teach one cue per action and make sure the wording is binary where possible: either do it or don’t. Ambiguous phrases create doubt. Pair every verbal cue with a distinct visual — for example, a pointed arm for “switch” or a palm-down held in front of the chest for “slow/hold.” Repetition and immediate correction are crucial: during drills, stop and ask a player to explain the cue in their words, then repeat the drill with corrected execution.
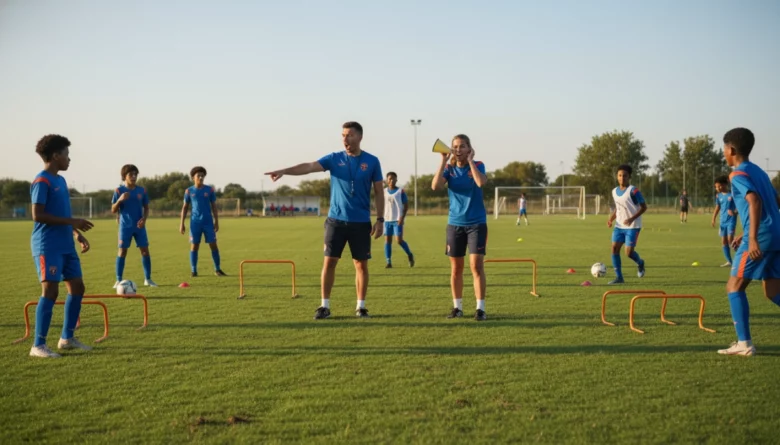
Also set limits on who can call certain cues. Too many voices create noise. Designate leaders for each line (defence, midfield, attack) so responsibility is clear and accountability is easier to manage.
With these categories and rules established you’ll create a shared vocabulary; next you need drills that force players to use these cues under realistic pressure and in game-like sequences.
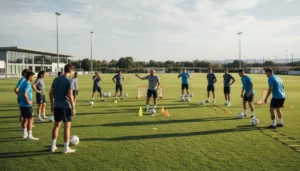
Drills that force players to use off-the-ball cues
Design drills so the cue is the only reliable path to success. Below are three reproducible exercises that put verbal and non-verbal cues under realistic pressure.
- Three-zone possession (6v6, neutral floaters): Mark three horizontal zones across the pitch. Two teams try to keep possession while moving the ball between zones; two neutral floaters always occupy the middle zone and support the team in possession. Conditions: max two touches in the outer zones, free touches in the middle. Objective: teams must use a cue to request the floater (“support”), trigger a vertical pass (“now”), or hold play under pressure (“hold”). Coaching points: stop play after a turnover and ask which cue was called and why; reward correct calls with a point and immediate restart.
- Switch-and-overlap progression (4v4+2 wide supports): Play in a narrow channel with two wide supports. Attackers must earn a switch to the wide player by calling “switch” and pointing. If the switch is successfully completed and the wide player receives under control, the attacking team gains an extra point. Add defenders or reduce touches to force earlier communication. Coaching points: enforce a single-word call plus a visual signal (arm point), and penalize delayed or duplicate voices to reinforce responsibility.
- Transition alarm game (7v7 with coached alerts): Teams start in possession; coach randomly shouts “pressure”, “cover” or “drop” and activates a neutral defender. Players must respond with the correct repositioning cue and movement within three seconds. Use loud ambient noise or whistles to simulate crowd. Progress by increasing randomness and reducing the margin for error. Coaching points: emphasize speed of cue, immediate teammate response, and a shared corrective phrase for mistakes (short and consistent).
Progressions: increasing realism and pressure without losing clarity
Once the basics are functional, progress drills in small, measurable steps so the language survives stressors common in matches.
- Reduce decision time: shorten touch allowances or introduce a countdown clock so cues must be earlier and crisper.
- Add defenders progressively: start with passive pressure, then introduce active pressing, and finally full-match intensity.
- Introduce noise and distraction: use speakers, crowd simulation, or simultaneous coach prompts to force reliance on non-verbal cues and succinct language.
- Implement fatigue phases: finish sessions with conditioning sets where players must sustain cue clarity while tired.
Measure progress with simple KPIs: percent of successful switches following a call, average reaction time to defensive alarms, and turnover reduction in the last 15 minutes of training versus the first. Keep changes incremental — a 10–15% increase in pressure or complexity per week preserves learning and boosts retention.
Embedding cues into match preparation and halftime management
Turn training cues into match-day instincts by packaging them into pre-game routines and halftime micro-sessions. Before the match, run a 10-minute walkthrough of common scenarios — goal kicks, throw-ins, high press recovery — and practise the exact short cues and hand signals you’ll use. Keep the vocabulary tight: three words per scenario max.
During halftime, use clips from the first half (even a short phone video) to highlight missed or excellent cueing. Assign each line leader one tactical focus for the second half (e.g., “right-back: hold vs overlapping runs”) so responsibility is clear. Finally, create a simple reinforcement system: call-and-response drills during warm-ups the following week, and public recognition for players who consistently execute clear, timely cues on match days. These small routines turn off-the-ball language from practice habit into competitive advantage.
Coach’s weekly checklist
- Pick one cue to prioritise for the week and make it the focus of at least three drills.
- Assign line leaders and remind them of their vocal/visual responsibilities before every session.
- Use small-sided games midweek to stress-test cue clarity under pressure.
- Run a 10-minute pre-match walkthrough of key scenarios; keep vocabulary to three words per scenario.
- Collect one simple KPI (reaction time to defensive alarms or successful switches following a call) and review the trend after each training block.
- Finish a training session with a conditioned set so players practise cueing while fatigued.
Make off-the-ball communication a team habit
Change happens in small, repeatable actions. Prioritise consistency over complexity: pick a handful of essential cues, practise them until they become automatic, and protect those cues from being diluted by too many voices. Empower your leaders to own the language, use video and immediate feedback to accelerate learning, and celebrate when the team executes clear, timely cues under pressure. For additional drills and coaching frameworks you can adapt, see The FA coaching resources.
Start tomorrow: choose one cue to emphasise, communicate that choice to your squad, and build one drill around it. Small steps every session will make off-the-ball communication the quiet engine of better decisions and cleaner team play.